 SnapPress

Media Library in WordPress: The Complete Guide (2026)
Quick answer: The Media Library in WordPress is the built-in tool for managing every image, video, audio file, and document uploaded to your site. It's a database-backed attachment system that stores files under /wp-content/uploads/ while keeping a matching record in the WordPress database. To keep it fast at scale, name files descriptively before uploading, use a bulk upload method (mobile app, drag-and-drop, or WP-CLI), install an image optimization plugin for WebP/AVIF conversion, add alt text to every image, and add a folder plugin like FileBird once you pass a few hundred items.
Below: how the Media Library works under the hood, efficient upload methods (including bulk), organizing a large library, image optimization for performance, and the errors that inevitably show up.
On this page
- What is the Media Library in WordPress?
- How the Media Library actually works
- Uploading and bulk upload methods
- Media Library plugins for WordPress
- Media Library folders: organization strategies
- Organizing your Media Library
- Image optimization for performance
- Responsive images, alt text, and lazy loading
- Troubleshooting common problems
- FAQ
What is the Media Library in WordPress?
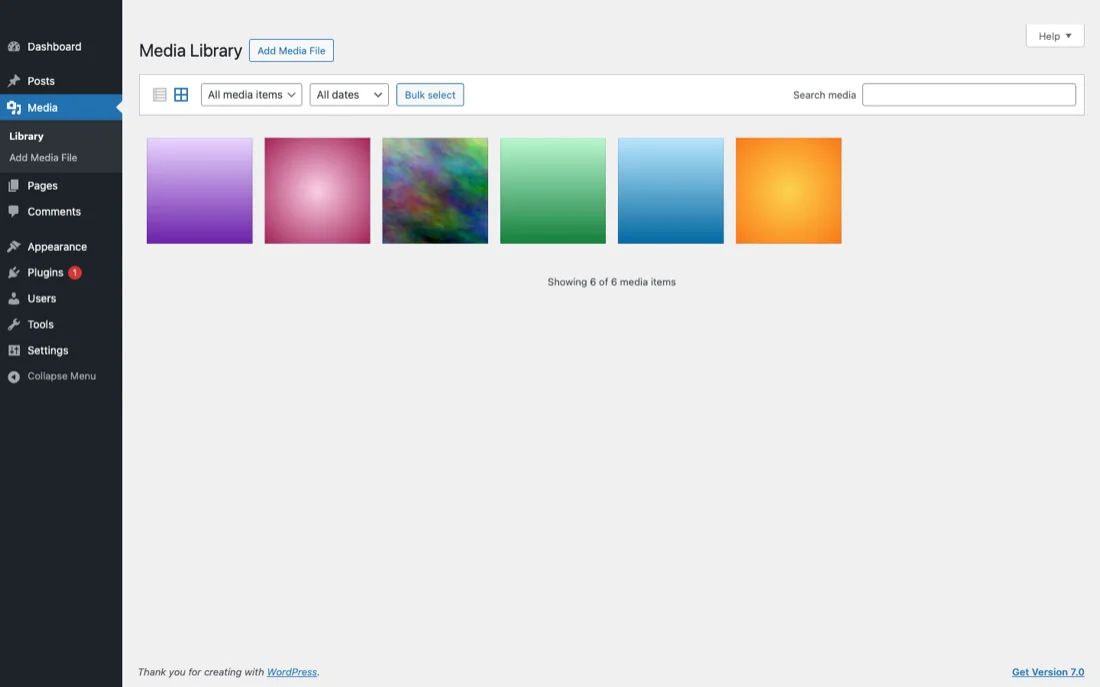
The Media Library in WordPress is a built-in tool that stores and manages every image, video, audio file, and document you upload to your site. You reach it from the WordPress admin sidebar under Media > Library, and any file you upload there becomes available to insert into posts, pages, custom post types, and theme settings.
Under the hood, the Media Library is two things at once: a folder of files on your server (under /wp-content/uploads/) and a set of database records that describe those files. That database side is the reason the Media Library exists at all. Without it, WordPress wouldn't know which images belong to which post, which thumbnail sizes were generated, what the alt text says, or which user uploaded the file.
What the Media Library actually gives you:
- Upload files once and reuse them across posts, pages, and widgets without re-uploading.
- Attach metadata (title, alt text, caption, description) that powers accessibility, SEO, and search inside the admin.
- Automatically generate responsive image sizes so browsers can pick the right version for each device.
- Track which posts a file is attached to, so you can audit usage before deleting anything.
- Control which file types are allowed on your site, which is part of WordPress's built-in security model.
If you have ever uploaded a photo by FTP and wondered why it doesn't show up under Media > Library, this is the reason: the file exists on disk but has no Media Library record. Almost every "manage images in WordPress" workflow flows through the Media Library, which is why it's worth understanding properly.
How the WordPress Media Library Actually Works
Before the tips, it helps to know what the Media Library actually is. It's not just a visual gallery — it's a database-backed system with a specific structure, and the structure explains a lot of the behavior you'll run into.
Where Files Are Stored
When you upload an image to WordPress, two things happen:
- The file is saved to your server, by default in
/wp-content/uploads/, organized into year and month folders (e.g.,/wp-content/uploads/2026/02/). You can change this structure under Settings > Media, but the year/month organization is recommended for sites with many images. - A database record is created. WordPress stores metadata about the image in the
wp_poststable (as an "attachment" post type) and thewp_postmetatable (for alt text, captions, file dimensions, and other metadata). This is why simply uploading a file via FTP doesn't make it appear in the Media Library: there's no database record.
Generated Image Sizes
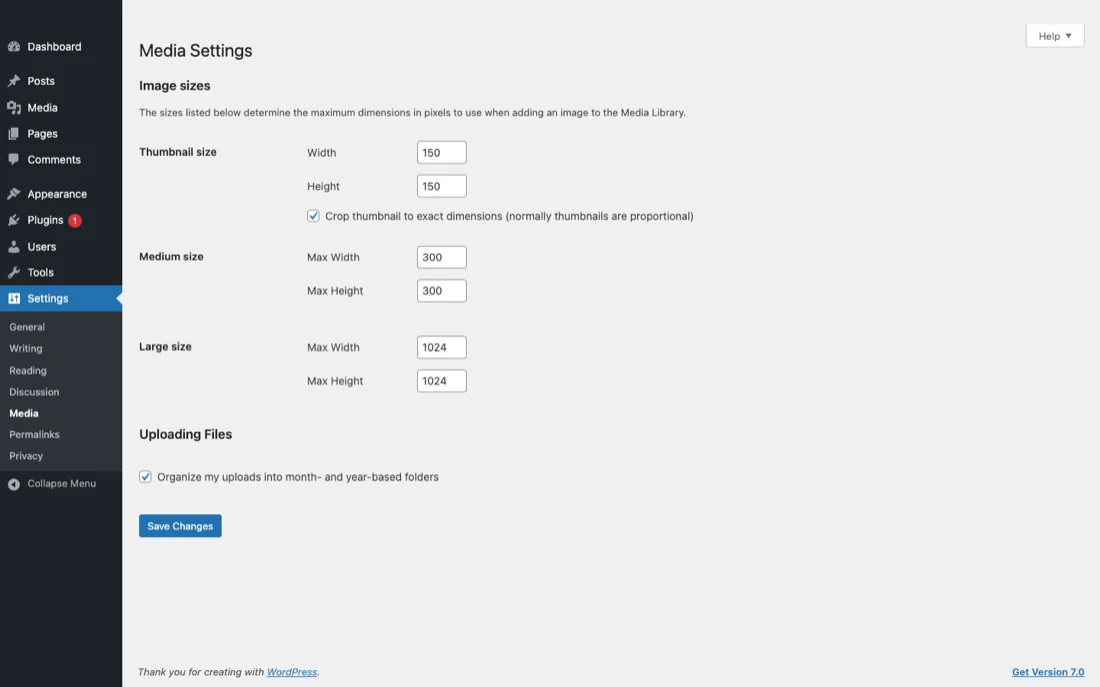
When you upload a single image, WordPress generates multiple versions of it at different sizes. The default sizes are:
| Size Name | Default Dimensions | Purpose |
|---|---|---|
| Thumbnail | 150 x 150px (cropped) | Admin thumbnails, small widgets |
| Medium | 300px max width | In-content images when you choose "Medium" size |
| Medium Large | 768px max width | Responsive image breakpoint (added in WP 4.4) |
| Large | 1024px max width | In-content images when you choose "Large" size |
| Full | Original dimensions | The original uploaded file |
Your theme and plugins may register additional custom sizes. WooCommerce, for example, adds product image sizes for shop grids and single product pages. A single uploaded image can easily generate 6-10 files on disk. If you upload a 4000px-wide photo, that one upload might consume 5-15MB of storage across all the generated sizes.
You can configure the default sizes under Settings > Media. The dimensions you set there apply to future uploads. Existing images aren't affected unless you regenerate thumbnails.
The Attachment System
Every media item in WordPress is technically a "post" of type attachment. This means it has:
- A title (defaults to the file name without extension)
- A caption
- A description
- Alt text (stored as post meta, not in the post itself)
- An attached parent post (the post or page where the image was first inserted, if any)
- A date (the upload date)
Understanding this structure is important because it explains how Media Library search works, why alt text and titles matter, and how attachments relate to your content.
Uploading Images to the Media Library
Standard Upload (WordPress Admin)
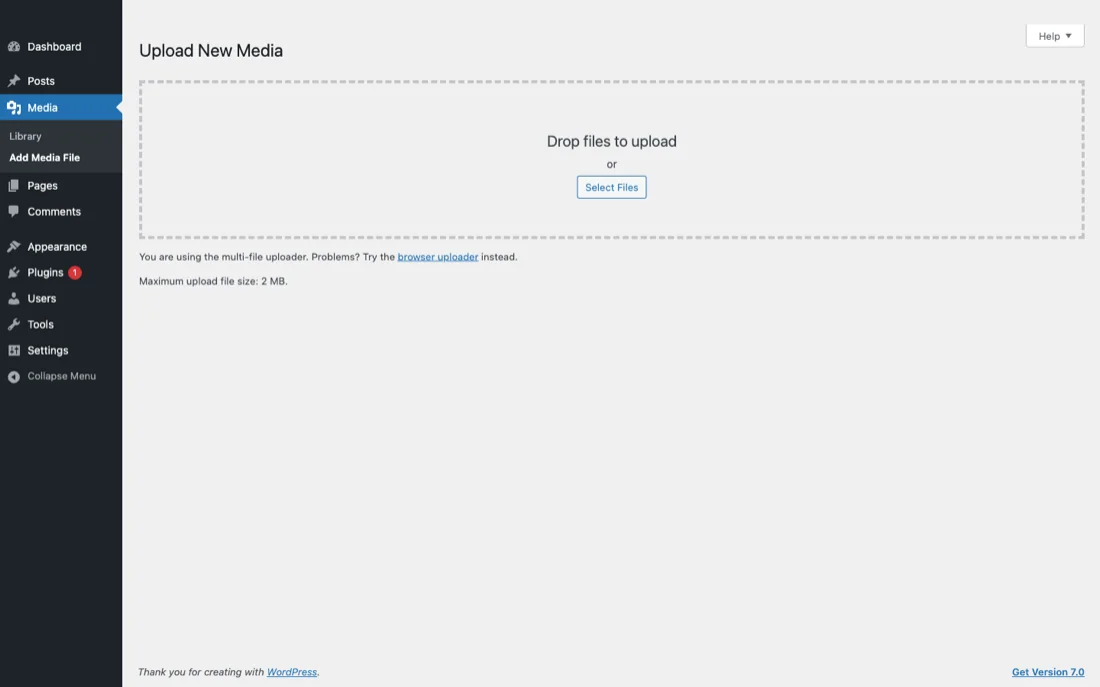
The most basic upload method is through Media > Add New in your WordPress admin. On desktop, you can drag and drop files into the upload area or click "Select Files" to browse your computer. WordPress will process each file, generate the various sizes, and add the database records.
Limitations of the standard uploader:
- The file size limit is determined by your server's PHP configuration (
upload_max_filesizeandpost_max_size). Common defaults are 2MB, 8MB, or 64MB depending on your host. You can check your limit on the Add New Media page, where it's displayed below the upload area. - Uploading many large files at once can exceed your server's
max_execution_time, causing uploads to fail silently. - When uploading multiple files, you see an overall progress indicator but no per-file status, making it hard to identify which file caused an error.
Bulk Upload Methods
When you need to upload more than a handful of images, the standard uploader starts to feel slow. Here are better approaches:
Mobile Batch Upload
If your images are on your phone (which is increasingly the case for bloggers, photographers, and store owners), a dedicated upload app is the fastest path. SnapPress lets you select up to 20 photos from your camera roll and upload them directly to the Media Library through the WordPress REST API. The images are properly registered with WordPress, so they show up in the Media Library immediately with all the correct database records and generated sizes.
For a detailed comparison of mobile upload tools, see our guide to the best WordPress photo upload apps. WooCommerce store owners pushing product photos in bulk should also read the WooCommerce bulk photo upload guide, which covers SKU-based naming and variant images. If you currently rely on Jetpack just for mobile uploads, uploading photos to WordPress without Jetpack walks through the lighter alternatives.
Desktop Drag-and-Drop
On desktop, the Media > Add New page supports multi-file drag-and-drop. Select all the images you want to upload in your file manager, drag them onto the browser window, and WordPress will upload them sequentially. This works well for 10-30 images but can be unreliable for larger batches due to browser timeout issues.
WP-CLI Upload
For developers or site administrators with SSH access, WP-CLI provides the most powerful bulk upload option. The wp media import command can import files from your server's file system, URLs, or even remote locations:
wp media import /path/to/images/*.jpg --title="Product Photo"
This command imports all JPEG files in the specified directory, creating proper Media Library entries for each one. It's the best option for migrating hundreds of images from another system or importing files that were uploaded via FTP.
Plugin-Based Bulk Upload
Several WordPress plugins extend the upload capabilities:
- Add From Server registers files that are already on your server (uploaded via FTP) with the Media Library
- Media from FTP is similar to Add From Server, with scheduling support for automatic registration of new FTP uploads
- FileBird is primarily a folder organization plugin, but it also includes enhanced upload features
Media Library Plugins for WordPress (and Why You Might Not Need Them)
"WordPress media library plugins" is one of the most-searched queries around the Media Library, and for good reason: the native experience is intentionally minimal. Before installing anything, it helps to separate plugins by what problem they actually solve.
Folder and organization plugins
The biggest gap in the Media Library is folder support. FileBird, Real Media Library, and HappyFiles are the most popular options. They add a folder tree to the left of the media grid, let you drag and drop files between folders, and keep WordPress's native search and filters intact. Some change physical paths on disk, others only organize records in the database. We cover the trade-offs in the next section on Media Library folders.
Image optimization plugins
Optimization plugins (ShortPixel, Imagify, Smush, EWWW Image Optimizer) sit on top of the Media Library and compress images during or after upload. They also handle WebP and AVIF conversion. These are the highest-value plugins to install on almost any site, because unoptimized images are the number one cause of slow WordPress pages. See the image optimization section for picks.
Bulk upload and FTP-aware plugins
If you upload files by FTP or SFTP, the Media Library won't see them until you register them. Add From Server and Media from FTP scan your uploads directory and create Media Library records for files already on disk. WP-CLI users can do the same with wp media import without a plugin.
Cleanup and audit plugins
For sites that have been running for years, Media Cleaner scans your database and filesystem to find files that exist on disk but are not referenced anywhere. Be careful here — references in page builder data, custom fields, and CSS background images can be missed, so always back up before deleting anything.
File-type-extension plugins
WordPress core blocks certain file types for security (PHP, JavaScript, HEIC by default). If you need to allow a specific type safely, use a targeted plugin rather than disabling restrictions wholesale. Safe SVG sanitizes SVG uploads, and for iPhone users, dedicated workflows handle HEIC properly — see our deep dive on WordPress allowed MIME types and HEIC support.
Security-related plugins
The "file type not allowed" error and similar upload security restrictions are there for a reason: the Media Library is one of the most common attack surfaces on WordPress. If you keep hitting upload restrictions, read why WordPress blocks certain file types before reaching for a plugin that disables those checks.
Mobile and remote upload tools
The Media Library's web uploader wasn't designed for phone-first workflows. A dedicated upload app like SnapPress sends photos straight from your camera roll into the Media Library via the WordPress REST API, with proper thumbnails, metadata, and multi-site support. Browse the best WordPress photo upload apps for a comparison.
The honest answer for most sites: install one image optimization plugin and (once you pass a few hundred items) one folder plugin. Everything else is optional and usually adds more dashboard noise than value.
Media Library Folders: Organization Strategies
By default, the WordPress Media Library has no folders. Every upload lives in one giant flat list, sorted by date. This is fine for the first hundred files and increasingly painful after that. Here's how to think about Media Library folders so you don't have to redo the structure six months from now.
Date-based folders (the WordPress default)
WordPress already organizes files on disk under /wp-content/uploads/2026/02/. This is invisible inside the admin but plays a role behind the scenes — it keeps any single directory from holding tens of thousands of files, which slows down some file systems. You can disable date folders under Settings > Media, but the date structure is recommended for sites with many uploads and there's rarely a reason to change it.
Plugin-based virtual folders (FileBird, Real Media Library, HappyFiles)
The most popular folder plugins create a virtual folder tree. Files stay in their date-based directories on disk, but the plugin stores folder assignments in the database and shows a tree view in the admin. The advantages:
- You can reorganize anytime without breaking image URLs.
- Existing posts, page builders, and external links to images keep working.
- You can search and filter inside a folder, drag and drop files between folders, and assign multiple folders to the same file (in some plugins).
The downside is that the folder structure only exists inside WordPress. If you switch plugins later or move to a new system, the folder data may not transfer. Real Media Library has an option to also restructure physical folders, which is more portable but breaks any hardcoded image URL.
Naming conventions as virtual folders
If you don't want a folder plugin yet, a strict naming convention gives you 80% of the benefit. Prefix every file with its category:
blog-2026-tokyo-coffee-shops.jpgproduct-leather-wallet-brown-front.jpgteam-sarah-chen-headshot.jpghero-homepage-spring-2026.jpg
WordPress search matches file names, so typing product- in the Media Library effectively becomes a "product folder." This costs nothing, never breaks during plugin changes, and improves SEO at the same time because search engines use file names as a ranking signal.
Folder strategy by site type
| Site type | Recommended folder strategy |
|---|---|
| Blog under ~500 images | No folder plugin. Use file naming conventions plus date and media-type filters. |
| Blog over ~500 images | FileBird (free) for a virtual folder tree. Group by topic or year. |
| WooCommerce / catalog | FileBird or Real Media Library, organized by product category or SKU prefix. |
| Multi-author publication | HappyFiles or Real Media Library with author or section folders. |
| Agency / multi-client | Real Media Library with physical folder restructuring, one folder per client. |
Whichever option you pick, decide on a folder structure before you have 2,000 images, not after. Retro-organizing is the hardest part.
Organizing Your Media Library
WordPress's native Media Library has limited organizational tools. No folders, no tags, no categories for media items. Fine for small sites. A real problem once you're past a few thousand images.
Built-In Organization Features
WordPress does offer a few built-in ways to find and filter media:
- Toggle between grid view (visual thumbnails) and list view (detailed columns for file name, author, date, and attached post). List view is more efficient for managing many files.
- The date filter lets you filter media by the month it was uploaded. This works well if you upload in predictable batches (e.g., all product photos from a specific shoot).
- The media type filter lets you filter by images, audio, video, or documents.
- Search checks file names, titles, captions, and descriptions. This is why descriptive file names are so important. Searching for "blue-canvas-tote" is far more useful than searching for "IMG_4523."
- Click any media item to see its full attachment details, including every post or page it's attached to, its file URL, and all available sizes.
Folder Plugins
For more sophisticated organization, media folder plugins add true folder functionality to the Media Library. The most popular options are:
FileBird (Free and Pro)
- Creates a folder tree in the left sidebar of the Media Library
- Drag-and-drop files between folders
- Doesn't change actual file URLs (organizational only)
- Free version supports unlimited folders
Real Media Library (Pro)
- Similar folder tree interface
- Includes automatic file organization rules
- Supports physical folder restructuring (changes actual file paths)
- Optimized for large media libraries
HappyFiles (Free and Pro)
- Lightweight folder solution with a clean interface
- SVG file support
- Integrates with popular page builders
Naming Conventions
The highest-leverage organizational strategy doesn't require any plugins: name files consistently and descriptively before uploading.
A good naming convention includes:
- A category or section prefix such as
blog-,product-,team-,hero- - A descriptive name showing what the image actually contains
- A variant identifier if applicable (front, side, detail, thumbnail)
- Hyphens between words, not underscores or spaces
Examples:
blog-tokyo-street-photography-shibuya.jpgproduct-leather-wallet-brown-front.jpgteam-sarah-chen-headshot.jpghero-homepage-spring-2026.jpg
This convention makes Media Library search extremely effective and also provides SEO benefits, since search engines use file names as a ranking signal for image search.
Image Optimization for Performance
Unoptimized images are the biggest drag on WordPress page speed. A single uncompressed phone photo can be 5-15MB; the optimized version of the same image comes in around 150-300KB with no visible quality difference on screen.
Optimization Fundamentals
Compression reduces file size by removing data that's invisible or barely perceptible to the human eye. There are two types:
- Lossy compression permanently removes some image data. JPEG compression at 70-85% quality produces files that are 60-80% smaller than the original with no visible quality loss at web display sizes.
- Lossless compression removes metadata and optimizes encoding without any quality loss. Typically achieves 10-30% file size reduction.
Resizing means reducing the pixel dimensions of an image before upload. A 4000 x 3000px photo resized to 2000 x 1500px is 75% fewer pixels, which translates directly to a smaller file size. Most WordPress themes never display images wider than 1200px, so uploading at 4000px is wasting bandwidth and storage.
Format selection means choosing the right file format for the image type:
| Format | Best For | File Size | Quality |
|---|---|---|---|
| JPEG | Photographs, complex images | Small | Good (lossy) |
| PNG | Graphics, screenshots, images with transparency | Large | Perfect (lossless) |
| WebP | Both photographs and graphics | Very small | Excellent (lossy or lossless) |
| AVIF | Next-gen format with superior compression | Smallest | Excellent |
| SVG | Icons, logos, simple illustrations | Tiny (vector) | Perfect (scalable) |
| GIF | Simple animations (prefer video for complex ones) | Large for animations | Limited (256 colors) |
WordPress Image Optimization Plugins
The practical approach: upload your images and let an optimization plugin handle compression and format conversion automatically. The options worth considering:
ShortPixel Image Optimizer
- 100 free image credits per month (each credit covers one image size, so one upload with 5 generated sizes uses 5 credits)
- Lossy, glossy (visually lossless), and lossless compression options
- Automatic WebP and AVIF conversion
- Bulk optimization for existing images
- Paid plans start at $3.99/month for 5,000 credits
Imagify
- From the WP Rocket team
- Three compression levels: Normal, Aggressive, Ultra
- WebP conversion
- 20MB free per month
- Clean, simple interface
Smush
- Free bulk optimization (50 images per batch)
- Lazy loading built in
- Pro version adds CDN serving and next-gen format conversion
- Integrates with Hummingbird (performance plugin from the same developer)
EWWW Image Optimizer
- Unique in that it can do compression locally on your server (no external API for basic compression)
- Free for basic lossless compression
- Paid tier adds lossy compression and WebP conversion
- Good for sites with privacy concerns about sending images to external services
Manual Pre-Upload Optimization
While plugins handle optimization after upload, you can also optimize images before uploading. This reduces upload time (especially on slow connections) and server processing load.
- On your phone, export images from your editing app at a specific resolution (1200-2000px wide) and JPEG quality (80-85%)
- On desktop, use tools like ImageOptim (Mac), FileOptimizer (Windows), or Squoosh (web-based) to compress images before uploading
- Most editing apps support batch export at a target resolution. In Lightroom, for example, you can set an export preset that resizes all images to 2000px on the long edge.
For photographers who regularly upload from their phones, pre-upload optimization combined with a batch upload tool creates the fastest possible workflow. Our WordPress photography workflow guide covers this in detail.
Responsive Images in WordPress
Since WordPress 4.4, the platform automatically adds the srcset and sizes attributes to image tags. This means browsers can choose the most appropriately sized image based on the viewer's screen size and resolution. A visitor on a phone loads a 400px-wide image instead of the full 2000px version, saving bandwidth and improving page speed.
How srcset Works
When you insert an image into a post, WordPress generates HTML like this:
<img src="image-1024.jpg" srcset="image-300.jpg 300w, image-768.jpg 768w, image-1024.jpg 1024w, image-2000.jpg 2000w" sizes="(max-width: 1024px) 100vw, 1024px">
The browser evaluates the srcset list and the sizes attribute, then downloads only the image that best matches the current viewport width and device pixel ratio. This is automatic, and you don't need to do anything special beyond uploading images at a reasonable resolution.
Best Practices for Responsive Images
- Upload at a resolution large enough for your largest display size, typically 2000-2400px wide. WordPress will generate the smaller sizes automatically.
- Don't disable WordPress's generated sizes. Some optimization guides suggest reducing the number of generated sizes to save storage. While this saves disk space, it can hurt performance by forcing browsers to download images that are larger than necessary.
- Check your theme's image handling. Some themes override WordPress's default responsive image behavior. Inspect your live pages (right-click an image > Inspect) to verify that
srcsetattributes are present.
Alt Text, Titles, and Captions: Getting Metadata Right
Every image in the Media Library has four text fields: title, alt text, caption, and description. Each serves a different purpose, and getting them right matters for both accessibility and SEO.
Alt Text
Alt text is the field that matters most. Two reasons:
- For accessibility, screen readers read alt text aloud to users who can't see the image. Without alt text, visually impaired users have no idea what the image shows.
- For SEO, search engines use alt text to understand image content and rank images in image search results.
Good alt text guidelines:
- Describe what the image shows, not what you want it to rank for
- Be specific: "Golden retriever catching a frisbee in a park" is better than "dog"
- Keep it under 125 characters, as screen readers may truncate longer text
- Don't start with "Image of" or "Photo of" because the screen reader already announces it as an image
- For decorative images (visual flourishes that don't convey content), use an empty alt attribute (
alt="") so screen readers skip them
Title
The image title appears as a tooltip when users hover over the image on some browsers. It defaults to the file name without the extension. While less important than alt text for SEO, a descriptive title helps with Media Library search and general organization.
Caption
Captions appear below the image when displayed in a post (depending on your theme). They're visible to all users and are one of the most-read parts of a page. Studies show that people read image captions more often than body text. Use captions to add context, credit photographers, or provide additional information that complements the image.
Description
The description field is used internally and appears on the attachment page (if your theme has one). Most sites disable attachment pages for SEO reasons (they create thin content pages that dilute your site's authority), so the description is primarily useful as an internal note.
Bulk Editing Metadata
Adding alt text to hundreds of images one by one is tedious. Here are some shortcuts:
- In the Media Library list view, you can select multiple images and use the Bulk Actions dropdown. However, WordPress's native bulk edit for media is limited and doesn't include alt text editing.
- Plugins like "Jenga Alt Text" or "Image SEO" can auto-generate alt text based on file names or image recognition. The results aren't perfect but can save time when you have a large backlog.
- For developers, WP-CLI lets you update alt text in bulk using
wp post meta updatecommands. This is the fastest method for large-scale metadata updates.
Lazy Loading
Lazy loading defers the loading of off-screen images until the user scrolls near them. This dramatically improves initial page load time, especially for pages with many images.
WordPress Native Lazy Loading
Since WordPress 5.5, the loading="lazy" attribute is automatically added to images. Since WordPress 5.9, the first image in content (typically the featured image or hero) is excluded from lazy loading and gets fetchpriority="high" instead, which is the optimal behavior. You want above-the-fold images to load immediately while deferring everything else.
When to Override Lazy Loading
In most cases, the WordPress defaults work well. However, you might want to adjust lazy loading if:
- If your theme loads a large header image, make sure it has
fetchpriority="high"and isn't lazy loaded - If you have a gallery above the fold, the first few gallery images shouldn't be lazy loaded
- Check Google PageSpeed Insights if your LCP (Largest Contentful Paint) image is being lazy loaded. If it has
loading="lazy", it's slowing down your Core Web Vitals score.
Handling Common Media Library Problems
HTTP Error During Upload
The generic "HTTP error" during upload is one of WordPress's most frustrating messages because it could mean many things. Common causes and fixes:
- If the file is too large, check your server's
upload_max_filesize. Ask your host to increase it or resize images before uploading. - Large file uploads can exceed the PHP
max_execution_time. Increasing this to 300 seconds usually resolves the issue. - Image processing (generating thumbnails) requires memory. Increase
WP_MEMORY_LIMITinwp-config.php:define('WP_MEMORY_LIMIT', '256M'); - Some server security modules (mod_security) flag large POST requests as suspicious. Your host can whitelist WordPress uploads.
- The
/wp-content/uploads/directory needs write permissions (typically 755 for directories, 644 for files).
Images Not Displaying After Upload
If images upload successfully but don't display on the front end:
- Click the image in the Media Library, copy the URL, and try to access it directly in your browser. If it returns a 404, the file may not exist on disk despite having a database record.
- The image files need to be readable by the web server (644 permissions).
- If you use a CDN, make sure it's configured to serve files from the uploads directory. A common issue is the CDN not syncing new uploads.
- If your site uses HTTPS but image URLs use HTTP, browsers will block them. Use the Better Search Replace plugin to update old URLs.
Media Library Running Slowly
As your library grows into the thousands of items, the grid view can become sluggish. Solutions:
- Switch to list view. It loads faster than grid view because it doesn't render thumbnail images inline.
- Use date filters to narrow the displayed range, which reduces the number of items loaded.
- The Media Library makes database queries for every displayed item. More PHP memory and a faster database help.
- FileBird and Real Media Library both optimize Media Library queries for large collections.
Regenerating Thumbnails
If you change your theme, update your WooCommerce image settings, or modify the default image sizes in Settings > Media, your existing images won't automatically update to the new sizes. You need to regenerate thumbnails.
The Regenerate Thumbnails plugin handles this. It re-processes every image in your library, creating new versions at the current size settings. For large libraries, this can take a while. The plugin runs in batches to avoid server timeouts.
If you have SSH access, WP-CLI is faster: wp media regenerate --yes
Security Considerations
File Type Restrictions
WordPress limits the file types that can be uploaded to the Media Library. By default, it allows common web formats (JPEG, PNG, GIF, WebP, PDF, etc.) but blocks potentially dangerous files (PHP, JavaScript, executable files). Don't disable these restrictions. They exist to prevent attackers from uploading malicious code through compromised accounts.
If you need to upload a file type that WordPress blocks (e.g., SVG), use a plugin that sanitizes the file before allowing it. The "Safe SVG" plugin, for example, sanitizes SVG files to remove potentially malicious code while allowing the upload.
iPhone users often hit a related issue: photos saved as HEIC fail silently because WordPress core doesn't recognize the format. See how to handle HEIC photos on WordPress for the two reliable fixes, and WordPress allowed MIME types and HEIC support for the full list of formats core accepts. If you keep running into "Sorry, this file type is not permitted for security reasons," read why WordPress blocks certain file types before disabling those checks.
EXIF Data and Privacy
Photos from phones and cameras contain EXIF metadata that can include GPS coordinates, device information, and timestamps. If you're uploading photos that reveal locations you don't want to share publicly, strip EXIF data before uploading. Most image optimization plugins remove EXIF data during compression, but you should verify this in your plugin's settings.
Hotlink Protection
Hotlinking occurs when other websites embed your images directly, using your server's bandwidth to display images on their pages. If you notice unusual bandwidth usage, enable hotlink protection through your CDN, your server's .htaccess file, or a security plugin like Wordfence.
Advanced: Database Cleanup and Maintenance
Over time, your Media Library can accumulate "orphaned" files: images that exist on disk but have no corresponding database entry, or database entries that point to files that no longer exist. This clutter wastes storage and can cause confusion.
Finding Unattached Media
In the Media Library, use the "Unattached" filter (available in the dropdown above the media items) to find images that aren't attached to any post or page. Note that "unattached" doesn't necessarily mean "unused." An image could be unattached but still referenced in a post via its URL or used as a site logo, widget image, or in a custom field.
Cleanup Plugins
- Media Cleaner scans your database and filesystem to find unused media files. It's cautious by default, moving files to a trash folder rather than deleting them immediately, so you can verify before permanent removal.
- JENGA Image Cleanup identifies orphaned files and broken references. Useful for post-migration cleanup.
Always back up your site before running any cleanup tool. Even the best media cleanup plugins can occasionally flag files as unused when they are referenced in unexpected ways (custom fields, page builder data, CSS background images, etc.).
Working with the Media Library Across Multiple Sites
If you manage multiple WordPress sites, you're dealing with multiple separate Media Libraries. There's no built-in way to share media between WordPress installations. Some approaches:
- WordPress Multisite can share a network-wide media library with the right configuration, but this adds complexity and is generally only worth it for tightly related sites.
- Plugins like "WP Offload Media" can store your media files on Amazon S3 or another cloud storage service, which can be shared between sites.
- If your workflow involves uploading the same types of images to different sites, a multi-site upload tool streamlines the process. SnapPress, for example, lets you connect multiple WordPress sites and switch between them when uploading from your phone. The SnapPress Connect plugin setup guide walks through pairing each site via QR code.
WordPress Media Library vs. Third-Party DAM Solutions
For sites with very large media collections (10,000+ assets), some organizations outgrow the WordPress Media Library and adopt a Digital Asset Management (DAM) solution. DAMs like Brandfolder, Bynder, or Cloudinary provide advanced features like AI-powered tagging, version control, access permissions, and brand guidelines enforcement.
However, DAMs are typically expensive (hundreds to thousands of dollars per month) and add complexity. For the vast majority of WordPress sites, even those with several thousand images, the WordPress Media Library with a good folder plugin and optimization setup is more than sufficient.
Key Takeaways
If you do one thing for your Media Library, make it these:
- Name files descriptively before uploading. This is the single highest-impact habit you can build.
- Use a batch upload method. Whether from your phone or desktop, uploading multiple images at once saves significant time.
- Install an image optimization plugin. Automatic compression and WebP conversion improve your site's performance with zero ongoing effort.
- Add alt text to every image for accessibility and SEO.
- Consider a folder plugin. Once you have more than a few hundred images, folder organization pays for itself in time saved.
- Do regular maintenance: clean up unused media, regenerate thumbnails after theme changes, and monitor your storage usage.
The Media Library isn't glamorous, but it's foundational. A well-organized, optimized image library makes every other part of your WordPress workflow faster, from writing posts to maintaining site performance to finding that one photo you uploaded six months ago.
Frequently Asked Questions
What is the purpose of the Media Library in WordPress?
The Media Library in WordPress is the built-in tool for managing every image, video, audio file, and document you upload to your site. It stores each file under /wp-content/uploads/ and creates a database record in the wp_posts table so the file can be inserted into posts and pages, reused across content, given alt text and captions for SEO and accessibility, and resized into multiple variants for responsive display.
Where is the Media Library located in WordPress?
The Media Library lives in your WordPress admin dashboard under Media in the left sidebar. Visit Media > Library to browse and search every uploaded file, and Media > Add New to upload more. The underlying files are stored on your server at /wp-content/uploads/, organized into year and month folders by default.
Where does WordPress store uploaded media files?
WordPress saves files to /wp-content/uploads/ on your server, organized into year and month folders by default (e.g., /wp-content/uploads/2026/02/). It also creates a database record in the wp_posts table as an attachment post type, plus metadata rows in wp_postmeta for alt text, captions, and image sizes.
How many images can the WordPress Media Library hold?
There's no hard limit. Sites with 50,000+ media items work fine if the database is healthy and you use folder or filter plugins. Performance issues usually start in the admin grid view past a few thousand items, which switching to list view or installing FileBird or Real Media Library resolves.
What is the fastest way to bulk upload images to WordPress?
From a phone, a dedicated app like SnapPress uploads up to 20 photos at once via the REST API. On desktop, drag-and-drop on Media > Add New works for 10-30 files. For 100+ files or migrations, WP-CLI's wp media import command is the most reliable, since it bypasses browser timeouts entirely.
Why do my image uploads fail with an HTTP error?
The most common causes are exceeding upload_max_filesize, hitting PHP max_execution_time on large images, insufficient WP_MEMORY_LIMIT for thumbnail generation, mod_security blocking large POSTs, or wrong permissions on /wp-content/uploads/ (should be 755 for directories, 644 for files). iPhone users should also check whether the photo is HEIC, which WordPress core doesn't natively accept.
Do I need a folder plugin for the WordPress Media Library?
Not until you have a few hundred images. Below that, descriptive file names and the built-in date and media type filters are enough. Once your library passes ~500 items and you struggle to find images, FileBird or Real Media Library pays for itself in time saved.
Should I compress images before uploading or use a plugin?
Both, if performance matters. Pre-upload resizing to 2000-2400px max width reduces upload time and server load. An optimization plugin like ShortPixel, Imagify, or EWWW then handles WebP/AVIF conversion and additional compression on each generated size. Doing only one of the two leaves real performance on the table.
Make uploading the easy part of Media Library management.
SnapPress lets you batch upload up to 20 photos from your phone directly to WordPress. QR code setup, Share Extension, multi-site support. Free to start — $0.99/mo or a one-time $4.99 lifetime purchase.
Two steps to start: install the free "SnapPress Connect" plugin on WordPress, then install the iPhone app and pair them with a QR code.
About the author

Founder & CEO, 37Design
Founder & CEO of 37Design, a web and AI consultancy based in Tokyo, Japan. Built SnapPress to eliminate the pain of uploading dozens of iPhone photos to WordPress — one by one.
37design.co.jp