 SnapPress
WordPress Image Size Not Changing: 10 Causes and Fixes (2026)
If your WordPress image size won't budge, the cause is almost certainly one of ten things. Block editor constraints, theme CSS overrides, server settings, plugin conflicts — the list reads like a catalog of "it should work but doesn't" scenarios. What makes it annoying is that several of these look identical from the user's end. So the fix is methodical elimination.
Below: all ten, each with the exact fix. (If your problem is that images won't upload at all — wrong display size is a different beast — see WordPress image upload errors and how to fix them first.)
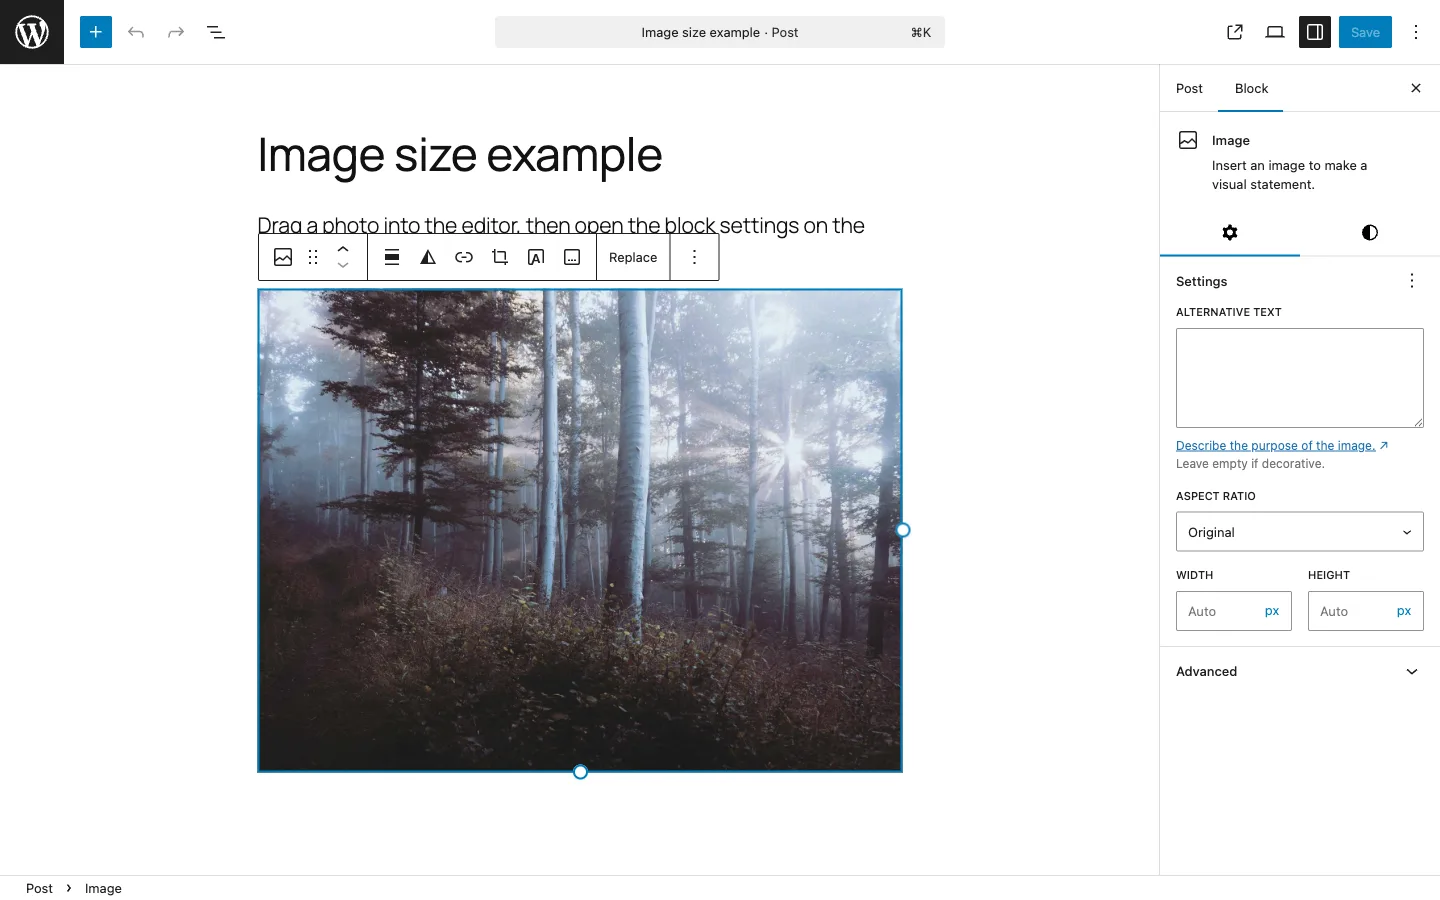
Quick Diagnosis: Which Symptom Do You Have?
| Symptom | Most likely cause |
|---|---|
| Size setting reverts immediately after saving | Cause 2: Theme CSS width: 100% !important |
| Drag handle won't resize larger | Cause 5: Image smaller than display target |
| Edit Image button is greyed out | Missing GD or Imagick, or Cause 9: HEIC format |
| Only "Full Size" available in the size dropdown | Cause 4: Media Settings not regenerated |
| Uploaded image is automatically shrunk | Cause 7: Big image size threshold (2560px) |
| Change saves but looks the same in the browser | Cause 8: Browser or CDN cache |
Cause 1: Block Editor Content Width Limit
Your theme sets a content width ceiling, and the block editor enforces it. Theme caps the column at 720px? That's the maximum your image block will show, no matter what number you type into the sidebar. Not a bug — it's how the theme is designed to lay out.
How to fix it
- Select the image block and look for the Alignment toolbar at the top of the block. Try Wide width or Full width — these break out of the content column.
- If those options are absent, your theme has not declared
add_theme_support('align-wide'). Add it to your child theme'sfunctions.php. - For themes like Astra, GeneratePress, or Kadence, look in their Customizer settings for a "Content Width" or "Site Layout" option and increase it.
Cause 2: Theme CSS Overriding Width with !important
A lot of themes drop a width: 100% !important rule on .wp-block-image img to keep images responsive. Once that's in place, it beats anything you type in the block sidebar. The image just stays locked to 100% of whatever the column width is.
How to confirm it
- View the live page and press F12 to open DevTools.
- Right-click the image and select Inspect.
- In the Styles panel on the right, look for a
widthproperty with!importantattached. - If you see it strikethrough when you uncheck it and the image changes size, that rule is the problem.
How to fix it
Go to Appearance → Customize → Additional CSS and add a more specific rule:
.wp-block-image.size-custom img {
  width: 50% !important;
  height: auto !important;
}
Or add a custom CSS class to the specific image block (e.g. my-half-image) and target it precisely:
.my-half-image img {
  width: 50% !important;
  height: auto;
}
Cause 3: Full-Width Block Patterns and Cover Blocks
Block patterns and Cover blocks tend to span the full viewport. Any image inside them inherits that full-width context, which means the sidebar size controls do nothing. The pattern's width wins, full stop.
How to fix it
- Move the image out of the full-width pattern into a standard paragraph or group block.
- Replace the Cover block with a standard image block if you don't need the overlay text functionality.
- If you must keep the pattern, set the pattern's width constraint in its block settings before adjusting the inner image.
Cause 4: WordPress Media Settings Thumbnail Sizes
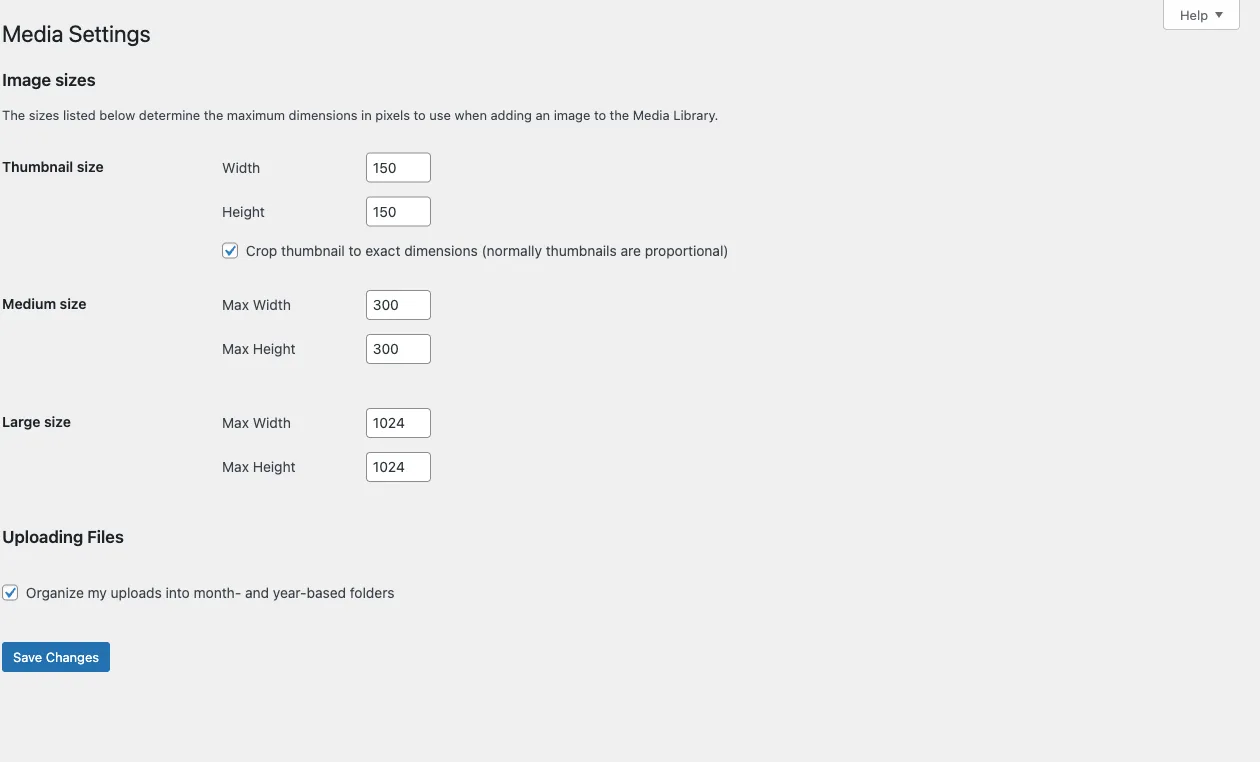
In your dashboard, head to Settings → Media. You'll see max dimensions for Thumbnail, Medium, and Large. The catch is that the block editor's size dropdown only lists sizes actually generated at upload time — no size created, no option to show.
How to fix it
- In Settings → Media, increase the Large size dimensions (default is 1024×1024; increase to 1920×1920 if needed).
- Install the Regenerate Thumbnails plugin and run it to apply new size settings to existing images. New uploads pick up the change automatically.
- To add a completely custom size, add
add_image_size('extra-large', 1920, 1080, true);to yourfunctions.php, then regenerate.
Cause 5: Original Image Too Small to Scale Up
There's a hard ceiling here: WordPress won't stretch an image beyond its native pixel dimensions. Upload at 800px, try to pull the handle toward 1200px, and it just... stops. That's on purpose — scaling up produces obvious blurriness.
How to fix it
Get a higher-res file. For in-content images, 1200px on the long side covers most themes; 1920px for full-width heroes. iPhone originals at 4032px are more than enough — the problem is usually that the image got compressed and shrunk somewhere before it got to WordPress.
Cause 6: Column Width Constraining the Image
Your file might be 1200px wide, but the column it lives in is 720px. The display caps at the column width, and the drag handle knows where to stop. It's the most common reason people report "I can't make it bigger than the column."
How to fix it
- Use the image block's Wide width or Full width alignment to break out of the column.
- Switch to a one-column layout (remove sidebars) to give the content area more room.
- Increase the theme's content width in its Customizer settings.
Cause 7: Big Image Size Threshold (2560px Auto-Scaling)
WordPress 5.3 introduced a rule: anything over 2560px wide gets auto-scaled down to 2560px on upload. The scaled version becomes the one WordPress serves. Upload a 4000px photo expecting to see it full-size? It's already been shrunk behind the scenes.
How to disable it
Drop this into your child theme's functions.php or a custom plugin file:
add_filter('big_image_size_threshold', '__return_false');Before you disable it, consider why it exists: performance and storage. Pushing a 4032px iPhone photo to every visitor is overhead nobody needs. Better fix: resize to a sensible web width (1920px or under) before upload, so you don't have to fight the threshold at all.
Cause 8: Browser or CDN Cache
Changed the size, saved, and... nothing. Before you start pulling hair out over CSS or plugins, clear the cache. WordPress doesn't version its image URLs by default, so the browser happily serves whatever it cached last time.
How to fix it
- Hard reload: Cmd+Shift+R on Mac, Ctrl+Shift+R on Windows.
- Open an incognito or private window to see the page without any browser cache.
- If you use a caching plugin (WP Super Cache, W3 Total Cache, WP Rocket), purge the cache from the plugin settings.
- If you use Cloudflare or another CDN, purge the CDN cache from its dashboard or use the development mode.
Cause 9: HEIC or Unsupported Image Format
WordPress 6.7 added native HEIC support. But a lot of shared hosts run custom PHP builds that either strip newer MIME types or don't include the libheif library. Result: the HEIC file gets accepted into the Media Library, but without a preview and with Edit Image greyed out. The server took the file but can't actually process it.
How to fix it
- Convert the image to JPEG before uploading. On iPhone, go to Settings → Camera → Formats and choose Most Compatible to shoot in JPEG by default.
- For photos already shot in HEIC, use a conversion app. SnapPress converts HEIC to JPEG automatically on the device before sending to WordPress, so no server-side support is needed.
- For a detailed walkthrough, see HEIC photos from iPhone and WordPress and how to enable HEIC uploads in WordPress.
Cause 10: Image Optimization Plugin Conflict
Smush, EWWW, ShortPixel, Imagify — these optimization plugins re-process images after upload. Depending on config, they can regenerate thumbnails at fixed sizes that clash with the block editor's expectations, or they serve WebP versions through URLs that bypass WordPress's size system entirely.
How to isolate it
- Deactivate all image optimization plugins.
- Test the image size controls. If they now work correctly, reactivate plugins one at a time to identify the conflict.
- Inside the conflicting plugin's settings, look for options to disable "auto-regenerate thumbnails" or "WebP conversion for existing sizes."
How to Upload iPhone Photos at the Right Size from the Start
Working through ten causes on every upload is tedious. If you're regularly pushing iPhone photos to WordPress, the smarter move is to fix the size before the image even gets there.
SnapPress is a purpose-built upload app for iPhone that pushes images straight to your WordPress Media Library via the REST API. For size problems specifically, it addresses three of the causes above:
- Resize on device before upload: Pick a target width (1200px web-optimized, or higher) and SnapPress handles it before sending. The image lands in WordPress at the right dimensions — no Big Image Threshold involved.
- Automatic HEIC to JPEG conversion: Kills the HEIC format issues from Cause 9 in one step.
- Upload up to 20 photos at once: Batch uploads with consistent sizing across the batch — handy for gallery posts where uniform dimensions matter.
For the best display sizes for featured images, see WordPress featured image sizes explained. For placing uploaded images side by side, see how to put images side by side in WordPress.
Frequently Asked Questions
Why does my WordPress image size keep reverting after I change it?
The most common cause is a theme CSS rule applying width: 100% !important to .wp-block-image img, which overrides whatever you set in the block editor. Open browser DevTools, inspect the image element, and look for a !important rule in the Styles panel. You can override it with a custom CSS class on the image block.
Why can I not drag the image handle to make it larger in the block editor?
WordPress won't scale an image beyond its original pixel dimensions to prevent blurry output. If the original upload is 800px wide, the block editor won't let you display it at 1200px. Upload a higher-resolution version of the image.
The Edit Image button in my Media Library is greyed out. Why?
WordPress needs either the GD or Imagick PHP extension installed on the server to edit images. Check your server's phpinfo() output for a 'gd' or 'imagick' section. On shared hosting, you can usually enable these extensions from your hosting control panel.
WordPress is automatically shrinking my uploaded images. How do I stop it?
WordPress 5.3 introduced a 'big image size threshold' that scales down any image wider than 2560px. Add add_filter('big_image_size_threshold', '__return_false'); to your child theme's functions.php or a custom plugin to disable it. Consider whether you actually need the full resolution before turning this off, as very large images slow down your site.
iPhone photos always upload too large. What is the best fix?
iPhone cameras shoot at 4032x3024px by default. That triggers the big image size threshold and often conflicts with theme layout widths. Using a dedicated upload app like SnapPress lets you resize to a target width (1200px, 1920px) before the image reaches WordPress, sidestepping both the threshold and the theme constraints.
Tired of fighting WordPress image size settings after every upload?
SnapPress resizes photos on your iPhone before they reach WordPress — no Big Image Threshold, no HEIC issues, no theme width conflicts. Upload up to 20 photos at once. Free to start, $4.99 lifetime.
Two steps to start: install the free "SnapPress Connect" plugin on WordPress, then install the iPhone app and pair them with a QR code.
About the author

Founder & CEO, 37Design
Founder & CEO of 37Design, a web and AI consultancy based in Tokyo, Japan. Built SnapPress to eliminate the pain of uploading dozens of iPhone photos to WordPress — one by one.
37design.co.jp